Job hunting as a student is chaos. You’re not applying to one or two places. You’re sending out tens, sometimes hundreds of applications across different companies, roles, and industries. At some point it stops feeling like a job search and starts feeling like a project. And like any project, visibility matters. Which roles have you applied to? What’s the status? When is the deadline? What’s the salary range?
Without a system, all of that lives in your head, and that’s a problem.
I built a tracking dashboard to manage this. I use both Google Sheets and Airtable together. Google Sheets because it’s fast, flexible, and easy to manipulate. Airtable because it has a beautiful interface and makes visualization far more efficient: you get a proper summary view of all your applications, statuses, and progress at a glance.
The problem? Maintaining both.
Every time I applied to a role, I had to manually copy the company name, role title, industry, salary, URL, deadline, and more: twice. Once into Sheets, once into Airtable. It was tedious, error-prone, and honestly just annoying enough that I started skipping it. And the moment you stop updating your tracker, it becomes useless.
So I decided to automate it.
Setting Up n8n: Self-Hosting with Docker
Before anything else, you need n8n running. I self-host it using Docker, which means everything runs on my own machine: no data going to third-party servers. If you haven’t set this up yet, this video walks you through the full process.
The Final Automation
Here’s how the workflow works end to end.
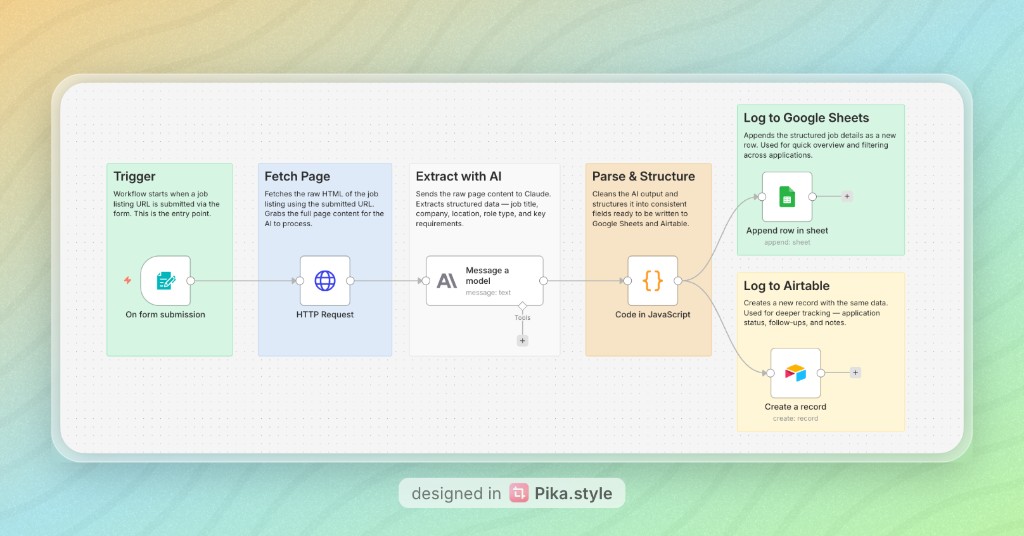
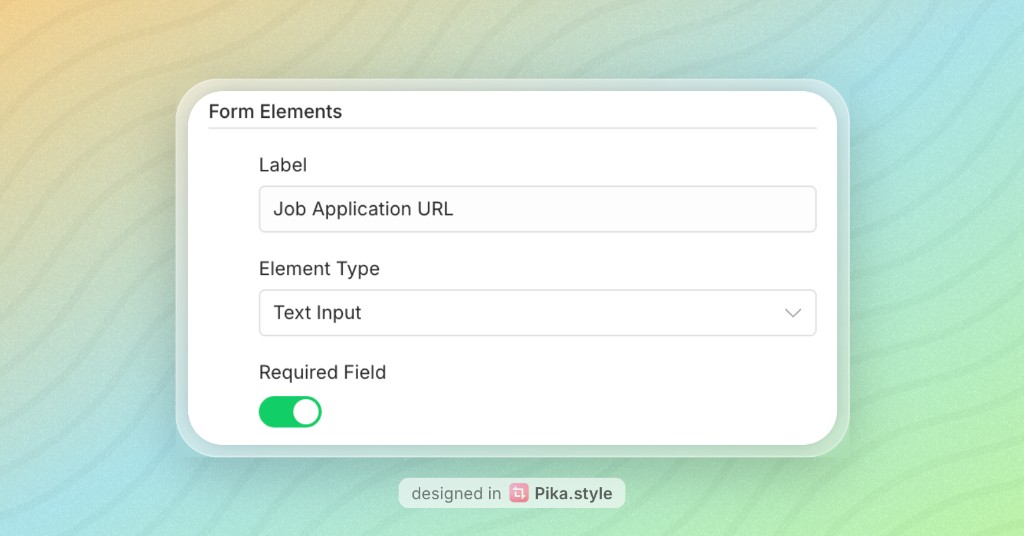
1. Trigger: Form Submission
The workflow starts when I submit a job listing URL through a simple form. This is the entry point: a form field that captures the URL and kicks everything off.
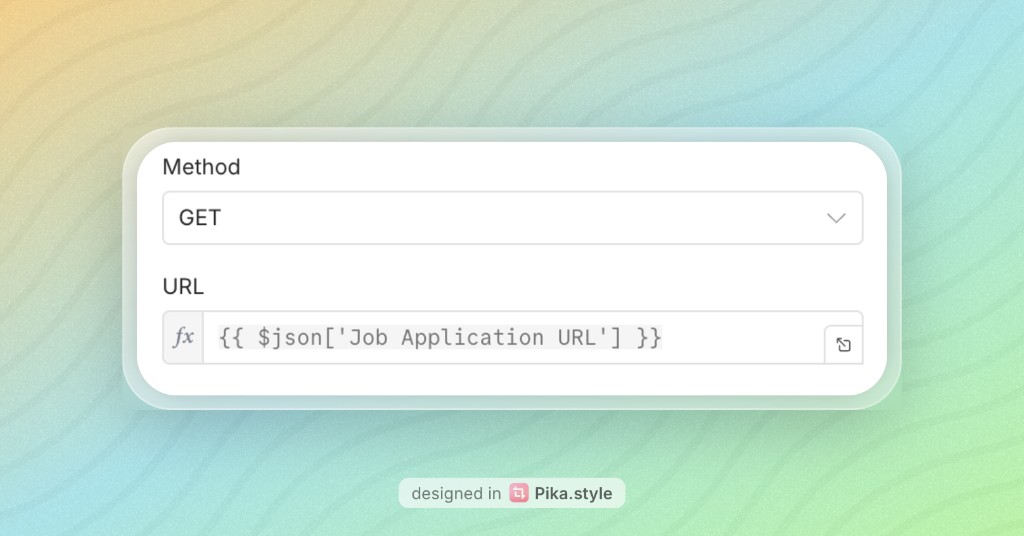
2. Fetch Page: HTTP Request
Once the URL is submitted, n8n makes an HTTP GET request to that URL and pulls back the full HTML content of the page. This raw content gets passed downstream to the AI node.
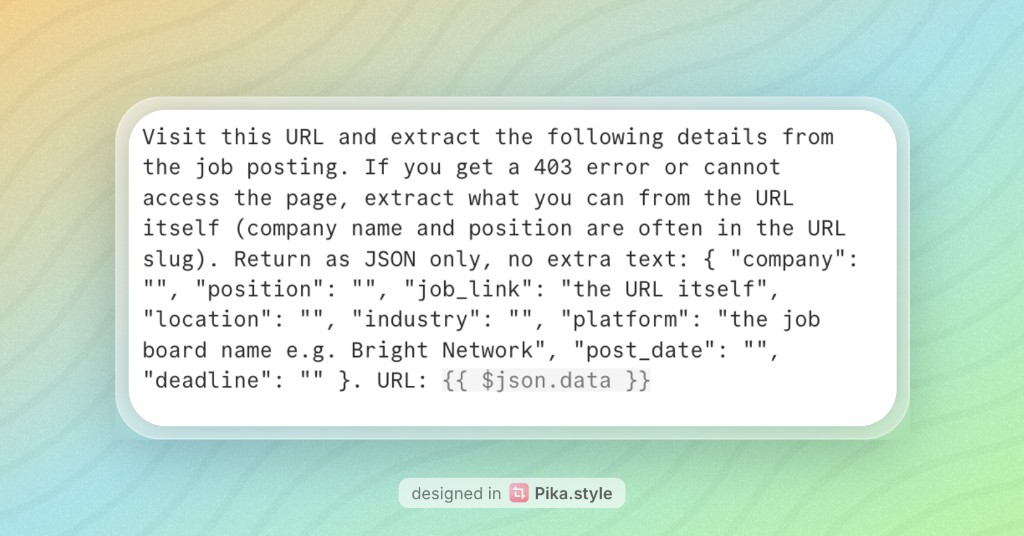
3. Extract with AI: Message a Model
The raw HTML goes into a Claude node. The prompt instructs Claude to extract key structured details from the page: job title, company name, location, role type, salary, deadline, and key requirements. Claude parses the unstructured content and returns clean, structured data.
Here’s the prompt used:
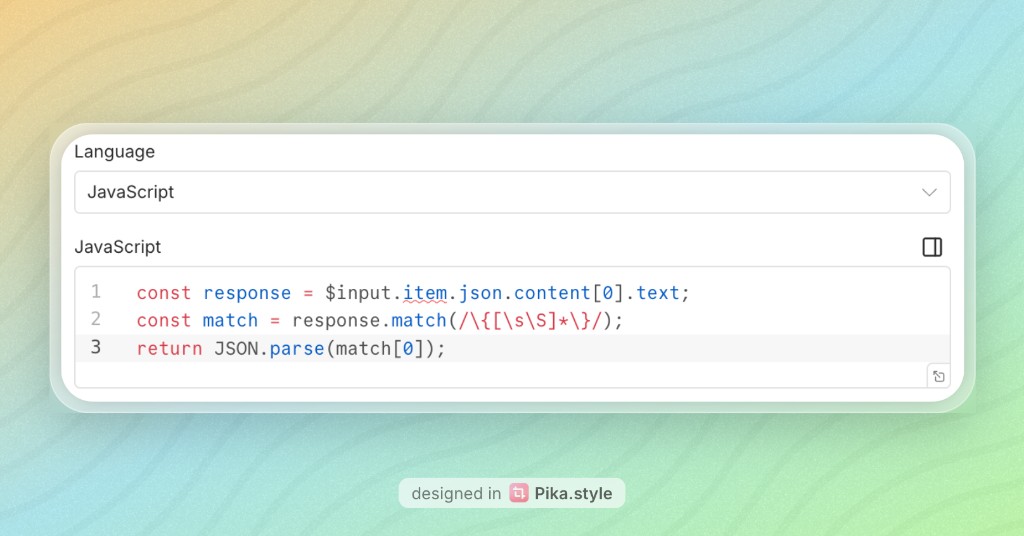
4. Parse & Structure: Code in JavaScript
Claude’s output comes back as text, so this JavaScript node cleans it up and maps it into consistent, well-defined fields. This ensures the data is in exactly the right format before it gets written to Google Sheets and Airtable.
5. Log to Google Sheets
I use the append row operation so the structured data gets added as a new row in Google Sheets. Each field maps to a column: company, role, location, salary, URL, deadline, and so on. I also store the current date (the day I submit the application) so I can track when I applied.
To connect Google Sheets to n8n, you’ll need to set up credentials via the Google Cloud Console: enable the Google Sheets API and generate an OAuth token. Full API documentation is available there.
6. Log to Airtable
The same data simultaneously runs a create a new record operation in Airtable. I include today’s date (the date of submission) here too, so both Sheets and Airtable are aligned. This is where I track application status (applied, interview, offer, rejected), and the dashboard gives me a much richer visual summary.
To connect Airtable, generate your personal API token from the Airtable Developer Hub. Full API documentation is available in the Airtable Web API introduction; for tokens, see Personal access tokens.
The Result
Now when I find a role I want to apply to, I paste the URL into the form (bookmark the production form link so you can open it from your bookmarks bar, paste the URL, and you’re done), hit submit, and within seconds it’s logged in both places with all the details filled in. No copying, no switching tabs, no manual entry.
Everything runs locally via n8n self-hosted on Docker: my data stays on my machine, and I’m in full control of the workflow.
If you’re in the middle of a job search and drowning in spreadsheets, this is worth building. The setup generally takes less than an hour or two, but the time it saves compounds quickly.
Before n8n: The Workaround
Before I built the proper automation, I had a makeshift solution. I connected Claude via MCP (by passing in an API token) and asked it to extract the job details from a listing. Once Claude returned a structured summary, I fed that output into ChatGPT Atlas, which took over and updated my Google Sheets by controlling my screen directly. It worked, but it was clunky. Multiple tools, multiple manual handoffs, and not something I’d want to run fifty times a week.
That’s what pushed me to build something cleaner inside n8n.
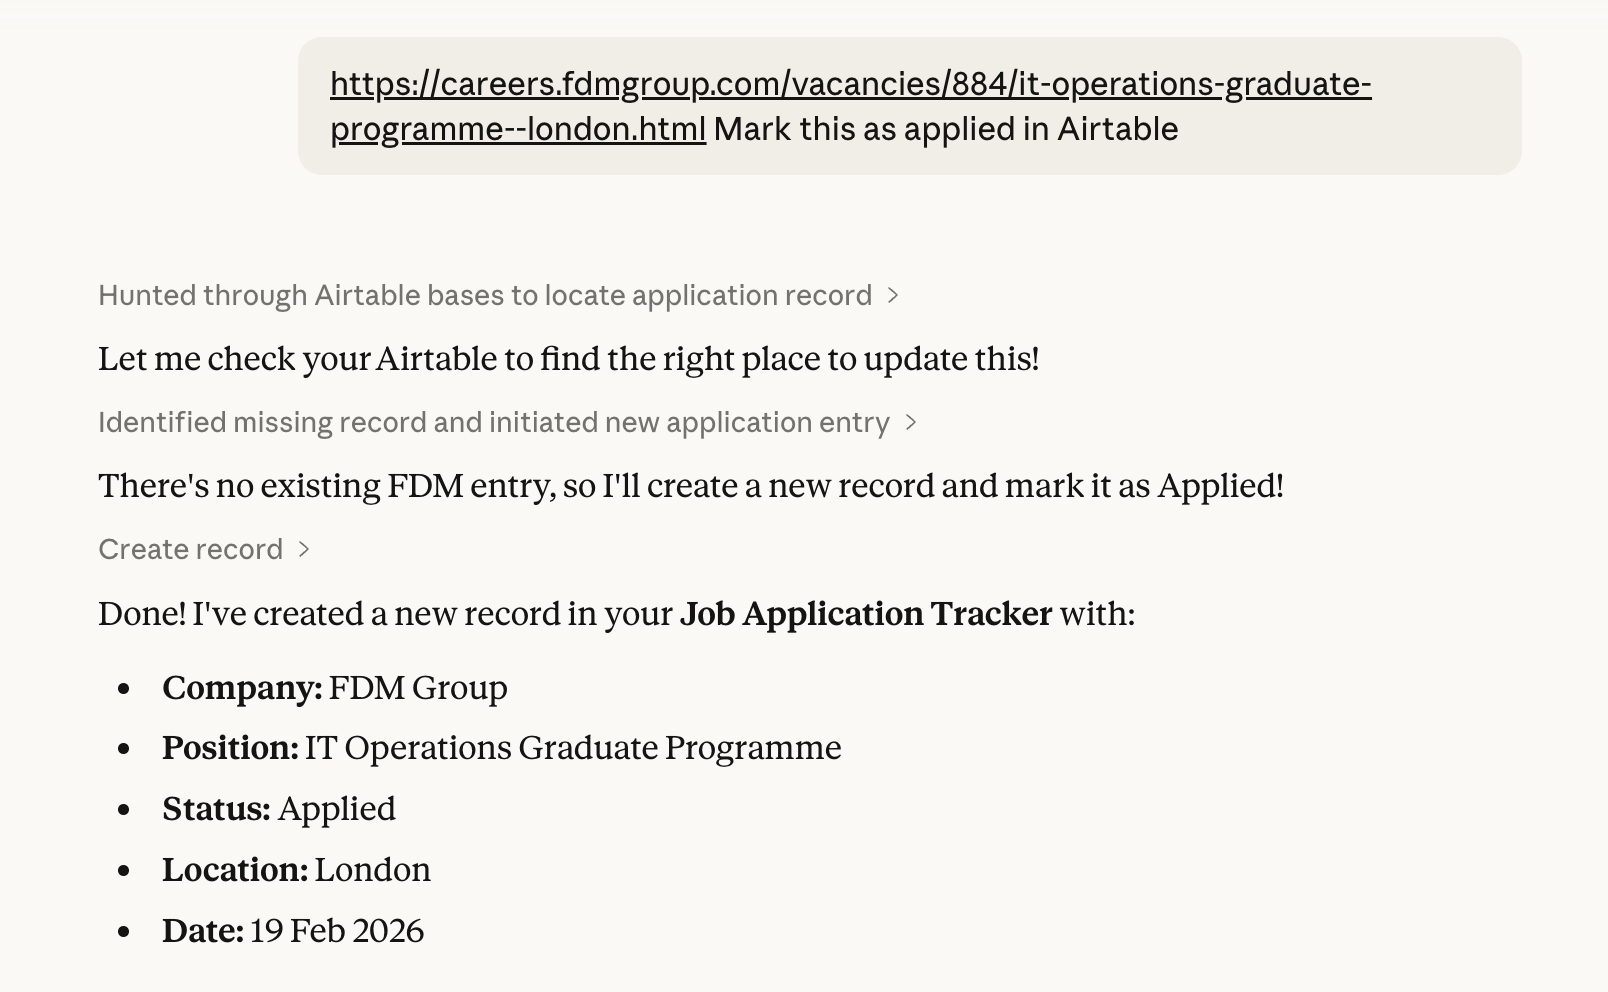
Here’s what the automation looks like when it runs: it finds or creates the record in your Job Application Tracker and fills in company, position, status, location, and the current date:
A Note on HTTP Requests, GDPR, and robots.txt
Fetching a job listing via HTTP is simply what a browser does: a GET request to a publicly accessible page. GDPR restrictions on websites are typically about cookie consent for tracked users, which doesn’t apply here. It’s worth checking a site’s robots.txt out of good practice, though for public job listings this is rarely an issue. Some pages are JavaScript-rendered and may return empty HTML. In those cases, paste the job description text directly into the form instead of the URL.
The workflow and node screenshots in this post were generated using Pika.style by Rishi Mohan.
If you want to talk about this, share your setup, or have any comments, you can find me on X. Use the link below.